I own a Asus EEE 900. It is a Celeron M, clocked at 900hz,1 gig ram, with a 4gig and a 16 gig internal SSD with Xandros as the stock operating system. I wanted to keep my Xandros on here as I have customized Xandros using the EEE PC Wiki .
So I bought me a 8 gig SDHC Flash Drive. Formated it with Gparted . I formatted the whole 8 gig flash drive as a Primary EXT 2 Partition with no swap partition. I then Downloaded Antix 8.2 and took out my Kingston 2 gig USB drive I have and used it to make a bootable USB using Unetbootin. By the way, You can use a smaller flash drive like a 1 gig or even a 512 mb to make your bootable flash drive. Though on the 512 mb one, I haven't tried it so if someone does use one. Let us know.
Ok, Now my 8 gig flash drive is installed into the r/h slot on Net book. I insert my 2 gig Bootable USB drive and Power up my Asus being sure to hit escape while booting so I can get into the boot order to select the live USB as first boot.
Press Space Bar as Antix Boots up. Now on to the Install. On your install the drives may be different designations than mine. So pay attention to which drive is which. I used Gparted and wrote down the drive letters for all my drives. Because with 2 internal, and 2 external drives. It is easy to get confused. So I recommend a pencil and a piece of paper.
Press AntiX Installer off of Menu Selection.

Agree to the terms and Hit Next

Now I open Gparted again during the install process so I can flag my Hard drive as Boot. I also Label my Hard drive as root "/".

I check every thing when done. Everything Looks in order. Notice that my 8 gig Flash drive is described as sdc1. This is important to remember as we go through the install. Remember or write on a piece of paper the drive letters. You will need them later.

Now close Gparted and we are back to the installer. Remember SDC? That is where I want AntiX to install to. So on Line 1a. I select sdc using the arrow next to where it says sda. I also select custom install on existing Partitions.

I hit next. This brings me to the next page. I make sure I click the box that says "Preserve data in /home if upgrading" so that my ext2 file system won't be reformatted as EXT3 (special thanks to ICE-M in AntiX forums for this tip). I make sure sdc1 is still the destination drive also.Disregard the ext3 tab window as clicking the box preserve data in /home if upgrading nullifies that.
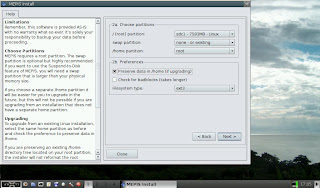
Hit next and Antix installer is nice enough to give you one final warning and let you know exactly where it is going to install to and also that you do not wish to format either. Once you say OK and hit next. You will be off to the races. If you say no you can start over. Nice feature I think.
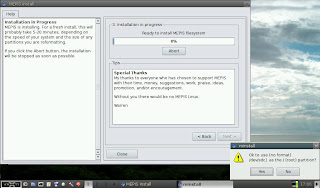
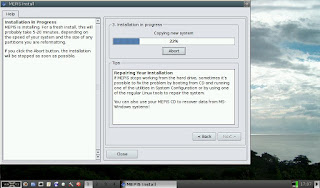
Now kick back and relax. Takes just a few minutes to install Depending on your rig.
Now to install grub. I make sure I have sdc selected as boot disk and tell it to install to MBR.
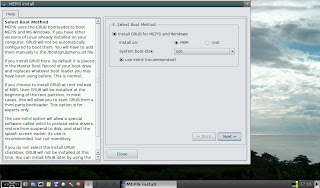
Hit Next. Wait for the Grub installed OK message.
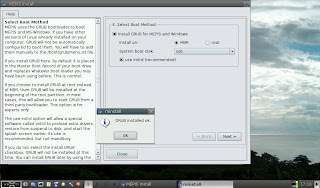
Hit OK. On to the next Page. I accept defaults and hit next.
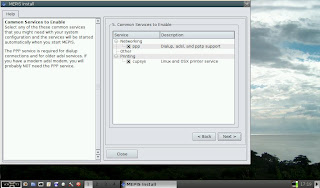
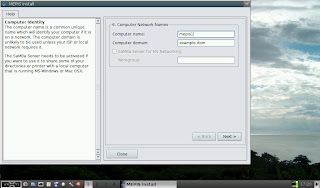
Next page type in Computer Name and domain.
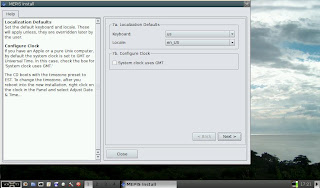
Next page sets up Keyboard and locale config.
Next page you set up user name and password and root password.
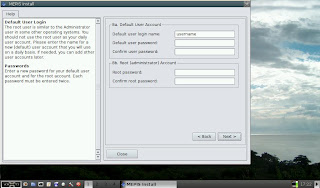
Next page is the finish line. When you hit finish. You may get a error, about naming the user directory. I just click OK and Hit finish again.
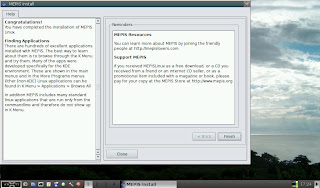
Now you get a pop up asking if you wish to continue running the Live USB/CD or reboot into the operating system. I chose not to reboot yet because I wished to shutdown completely so I could remove my Live USB Drive without hurrying.
I power up again after removing USB Drive. I make sure I hit escape to bring up my boot menu again in bios. I select my 8 gig flash drive as first boot. Every time I wish to boot up AntiX as a dual boot with Xandros, I will have to use escape button to select external 8 gig flash drive in the boot order to boot up AntiX. If I don't, it will just default to booting up Xandros. I am Welcomed with the AntiX Grub Screen. It is quite attractive. I select the top Menu item. AntiX boots. I get a grub error 15. I think in my unprofessional opinion that with 2 internal drives,and one 2 gig external USB,and 1 external 8 gig SDHC Flash card. That grub menu.lst got confused as to which drive was the boot drive for Antix. I have heard from a friend this happens with a Fedora 11 install to a external flash drive also.
I press any key to continue. Next I press the "e" key to get me to edit the grub entry for booting root. I press e again on the next page. I change the root entry (hd2,0) to (hd0,0), I press enter. Then I press the letter "b" so I can boot. Antix 8.2 Final is now booting up. I press the space bar again to continue with the booting process.
After I get to my Desktop I open Terminal. Now I used su to become root user. I typed in su without thinking. Actually you should type in sux in AntiX to become root user. But su worked for me.Hit enter. I type in my password and hit enter. I type in
leafpad /boot/grub/menu.lstand hit enter.

That opens up my /boot/grub/menu.lst with leafpad editor so I can now edit it to boot up AntiX properly.

I proceed to edit /boot/grub/menu.lst. I like a longer default time so I change it from 15 to 30 seconds. I edit both root entries in grubs menu so I can boot up AntiX and Xandros even If I boot from AntiX Grub screen. I change the Antix at sdc1 root entry from (hd2,0) to (hd0,0). I change my Normal Boot (which is actually Xandos) root entry from (hd0,0) to (hd1,0). My /boot/grub/menu.lst now looks like the screen shot below

Here is a complete screen screenshot of what my new AntiX 8.2 /boot/grub/menu.lst looks like. I only showed the smaller window on previous screen shots because I didn't need the whole window maximized to make the changes I needed to make.

I go to close the window when done and say yes to saving my changes.

Now all that is left is to connect to the net. I open Control Panel>Network>Connect Wireless.
I first go to preferences (on top task bar) and ( scroll though tabs in preferences till I find dhclient with a empty check box) and use dhclient to connect. You need to check that box to connect. At least I had to to connect completely. I then hit the connect button to connect up wireless and check the box for automatically connect to this network.

I then test my wireless

This is how I installed AntiX 8.2 to a 8 gig SDHC External Flash Drive. This worked for me. I prefer AntiX 8.2 instead of Easy Peasy or EEEbuntu because Of the speed at which it runs on the flash drive. Both Ubuntus don't require editing the /boot/grub/menu.lst if you decide to use either of those distros following this tutorial. I just prefer AntiX. Special thanks goes to Anticapitalista and all the members at AntiX Forum who held my hand and gave me help when asked for. Thanks guys.
One last hint or note. If You boot into Xandros with the flash card drive still plugged in and it gives you the pop up window for your flash drive to open it in File Manager. Just close it first. Then Unmount your Flash Drive using the icon from your bottom Task bar. The reason I mention this, is because the next time you boot up the flash drive into AntiX or whatever you install to flash drive. The boot loader will complain that you didn't unmount the external flash drive cleanly. It will then do a disk check for errors and then reboot again. So if you want to leave the external flash drive in its slot. Make sure you unmount it before you do anything else in Xandros. You might forget later when you go to shutdown. Just a small tip.
Update Sept11, 2009
To fix undefined Video mode at boot up I opened up as root /boot/grub/menu.lst and edited vga=791 to vga=785
This line in menu.lst is what I am refering to. You can use leafpad as root to edit it like I showed in above instructions.
kernel /boot/vmlinuz-2.6.27-1-mepis-smp root=/dev/sdc1 nomce quiet nosplash vga=785


