Thursday, April 30, 2009

Sound Converter

Sound Converter is a gnome sound conversion available for Linux. You can convert music files into another format (OOG, MP3 and Flac). The tool is very simple, just add the files, set the destination directory and convert the files.

The how to with pictures is here:
http://taufanlubis.wordpress.com/2008/05/14/sound-converter-%E2%80%...

Here is a more detailed How to from me.

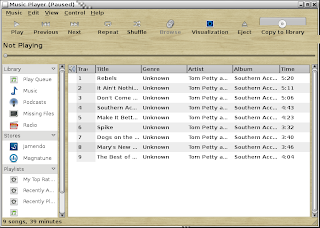
Insert CD, The window below should open up. Click on Copy to Library


Disregard the time in the lower window. It doesn't take that long on my rig. More like 10 to 15 minutes.
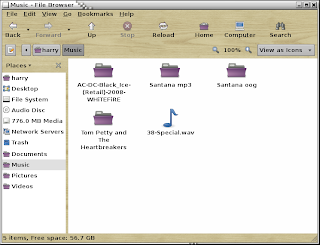
Open up home folder then music folder and you should have a folder like mine (though the one I'm doing is Tom Petty)


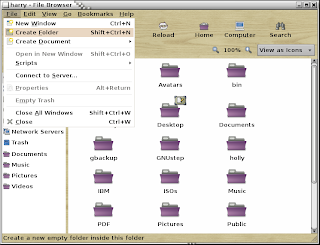
Now I'm going to create a Folder named Tom Petty 2 in harry/home


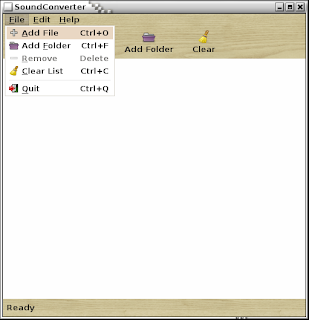
I wanna show you where sound converter now is.


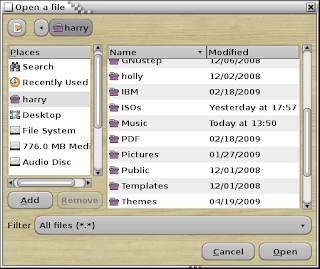
Now select open file


Find your Music folder, Double left click it. Keep double clicking till you get to the listing of music you wish to convert.


Now click on edit and use select all. This will highlight all the songs you wish to copy off album. You can delete any songs later when you are done in its new folder (Tom Petty 2), Or you can select just individual songs to convert. Next hit the open button and your window should look like this below.


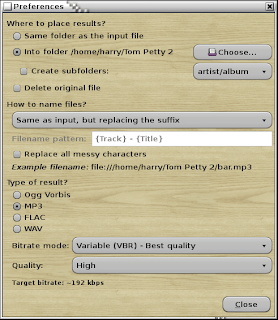
Now go to preferences. I make sure that destination folder is Tom Petty 2 by using the Choose button. I am converting my music from oog to mp3 if you look at the picture


Now just hit the Convert Button and you are off to the races. Not bad for a Tattoed knuckle dragging Biker who hated computers. If I can do it. Anybody can. Happy trails Guys and Gals

Friday, April 24, 2009

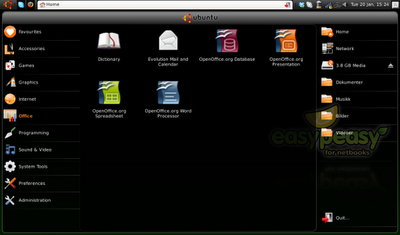
How to install Easy Peasy in Acer Aspire One


I 've been using Acer Aspire One for the last month and while I really like its GUI, which made it easy to use like a cell-phone, the pre-installed Linpus Lite is well...Lite...
So I decided to install Ubuntu 8.10. But the conventional GUI of any OS, whether it is Ubuntu, Fedora or Windows is not well fitted to 9" screens. So my options where to install the "Easy Peasy" version of Ubuntu (Formerly Ubuntu Eee) or to install the interface of HP Mini. As you already guessed from the article title, I installed Easy Peasy!!!


First download Easy Peasy and burn the image to a CD(if you have a USB Cd-Rom) or creat a Live-USB, using UNetbootin.
Unetbootin is a great tool that creates a Live-USB, using an ISO file of any Linux distribution. It works on Linux and Windows. It really can't get any better!!

Then press F12 while booting to invoke the boot menu and choose the USB.
It will take a while to boot from the USB, since netbooks are not very fast, but once installed it doesn't take too long to boot(and the next version of Ubuntu & Easy Peasy will boot much faster, especially if you choose to use the EXT4 filesystem).

Easy Peasy will immediately present you the Ubuntu installer. If you want to try it first, to make sure everything works OK, just close the installer. After trying it for 2 hours I concluded that wifi & ethernet work OK, sound and videos OK, camera (using the cheese program) worked OK as well. In 2 words, everything worked out of the box!! Try installing Windows, entering the 25-digit password, going through the activation procedure, install drivers for everything (motherboard, wifi) codecs, firefox, skype, MSN or Pidgin, OpenOffice or MS-Office, antivirus, anti-spyware, anti-trojan, anti-everything and tell us how many hours it took you!!

Enough ranting, let's get back to business...
The installation procedure is exactly the same as for Ubuntu. Select Language, time zone, keyboard layout, partitions, username & password and that's it.
One important point is to use a non-journaling filesystem, because journaling is accussed of reducing the life of SSD drives. If your model has the classic hard disk, than select EXT3 (or EXT4 in the next version 9.04 of Ubuntu, to get better boot times). If your model has SSD, than select EXT2 filesystem.
Apart from the EXT2 filesystem for the / partition, keep the swap partition as it is.

When the installation finishes, remove the USB and reboot. If you are connected to the Internet, you will be notified that there are updates available. These will probably be more than 150 and will take about 1 hour to be downloaded installed, but it is an easy 1click procedure.

If you prefer Thunderbird to Evolution, you can install it through Synaptic(in the Administration section) or from the terminal
sudo apt-get install thunderbird
I aldso installed vlc, although Easy Peasy has codecs for everything. Installation is the same as for Thunderbird.

It can't be that good, it just can't!!!! What's the catch???
If you can call it a catch, Ubuntu 9.04 was released in April 23rd, so you will either have to do a clean install or do an Internet update, which will take a LOT of time in a netbook and I can't recommend it. So you'll need to backup your /home folder, before the upgrade. Or you can wait for the next version of Easy Peasy that will be based on Ubuntu 9.04. Although Easy Peasy may stop being developed, since Jaunty has an official Netbook Version. I'll try it and post again in the next few days.

There is a minor bug, that you can fix within 30sec. The installer coming up every time you reboot after Easy Peasy is installed. Simply go to
->Preferences
->Sessions
and disable Ubiquity

Wednesday, April 22, 2009

1 day to go for Jaunty!

Ubuntu 9.04 Jaunty Jackalope will be released tomorrow!
Most blogs wrote that no exciting new features are present.
I agree. In 6 months Ubuntu got:
  • A newer kernel
  • New versions of every application(OO 3 at last, it should be on Ibex repositories all along...)
  • New cool notification system
  • Faster boot times thanks to optimizations by Canonical and much more if you use ext4 filesystem

Windows 7 on the other hand, after 3 years of hard work, will have faster boot time and less resource consumption than Vista, which I can't say is a big accomplishment. Making it slower than Vista, now THAT WOULD BE AN ACCOMPLISHMENT!!!!!
Oh and a new theme which looks suspiciously similar to KDE 4.2...How times have changed, Windows being accused as a rip-off...


So, I guess I don't totally agree with other bloggers... Although comparing Ubuntu's or any other Operating System's changelog with Fedora's 11, the comparison is simply humiliating. (Remember that Fedora did all those stuff in just 6 months!!!It is simply phenomenal) Moreover, many of those changes could probably be pushed in Ibex repositories and not require a system upgrade.(Hello, we want open office 3 in 8.10 without the need to enable an extra repository!!)

I am starting to lean on the side for yearly upgrade cycles, instead of 6-moths. Giving the programmers/hackers/developers more time to polish their programs will give everyone higher quality products with mush less bugs. Linux has already matured so much, that going into a 6-month cycle frenzy is no longer needed. "Just works" is just so close that simply avoiding regressions will be greatly appreciated by new users that see a much more technologically advanced system in Linux anyway. Another new feature that makes it even better than Windows in no longer required, compared making a system ready to work right after (or even before!!!) the installation with no user intervention at all.


So, enough of my little rant. Download & use Ubuntu yourself and if you have a netbook, the officialy supported Ubuntu Netbook Remix is a great choice!!

Monday, April 13, 2009

10 Individuals who have contributed the most to FOSS

I found in Tuxmachines a link about the biggest contributors to FOSS.
We should all be aware about the people that are forging a better future and ask nothing in return! Well, I believe some if not all became pretty rich or extremely well paid in the process, but they deserve it tenfold!!!They are not like "golden boys" that turned their companies bankrupt!!


http://www.l2admin.com/linux/10-individuals-i-feel-have-contributed-the-most-to-foss/

Thursday, April 9, 2009

How to speedup Firefox and Ice Weasel

This small How to is for those that wish to speed up their Browser, (Firefox or Iceweasel)

To start Off Open A New Tab in Browser to get a blank address bar.

Type in:

about.config

Hit enter

When you get the warning, say yes you will be careful you promise.

This will open a script page. Where it says filter and next to it is a blank address bar Type In:

pipe


Now, what you are going to do is change all these setting below to true.

network.http.pipelining;false
network.http.pipelining.ssl;false
network.http.proxy.pipelining;false

This setting below you are going to change to 30

network.http.pipelining.maxrequests;4

To do these changes, Right click network.http.pipelining line and left click on boolean.


In the preference name. Type in the line that you selected in the window.Then hit OK.


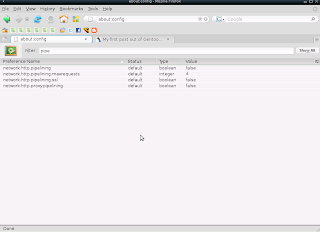
Change all the other lines with "type boolean " the same way your config file should now look like the screenshot below.


Now to change the last line, you do the same as the other lines, but this time you will select integer instead of boolean.


Now add the line like you did the others. then hit OK


Then in next window change the value from 4 to 30. Then hit OK. Your config file should look like this screenshot below now.


Now go ahead and close Firefox so changes can take effect. Then restart you faster browser. There is a noticeable speed improvement. I have also done this in Iceweasel and it works for it also. Happy Trails.

Friday, April 3, 2009

Back up Your Gnome Desktop and all Settings in Gnome.

Neat little tool. Yourgnome allow users to backup all things relative to Gnome on your Linux Machine. Packs everything into a tar.gz into your Home folder. Also includes the tools to extract the tar.gz file so you can restore your Gnome Desktop to a your previous saved state. I've used it and it works. I used the non GUI version when it first came out. Easy to use. Kudos to Abu Yusuf for taking the time to make it. There are 2 versions. A non GUI version that just runs in terminal. And a 2nd edition that is a GUI Version for people that just want to point and click. These are just some of the things Yourgnome will back up.

1- all your themes.
2- background you use settings.
4- gnome-panel settings.
5- bluetooth-manager settings.
6- evolution settings.
7- file-roller settings.
8- gnome-screensaver settings.
9- gnome-session settings.
10- gnome-terminal settings.
11- gnome-volume-control settings.
12- metacity & compiz settings.
13- update-manager & notifier settings.
14- totem settings.
15- network configuration set by Gnome.
16- screenlets

Before you start wondering if this works for KDE or XFCE. Sorry it is for a Gnome Desktop Backup only. Here is a example of the non GUI version when I ran it in Terminal. First I made a folder on my Desktop called "gbackup". Then I cd to my Desktop by typing into terminal. "cd Desktop" (without the quote marks please.)Then after my terminal looks like it does below. I just continue with the below steps.
_________________________________________________________________________________

harry@harry-desktop:~$ cd gbackup
harry@harry-desktop:~/gbackup$ sh yourgnome.sh
yourgnome Version 1 , yourgnome - Google Code

this tool used to backup your Gnome in one tar.gz file !
Also, it restores that backup for you when you want !


1] Backup.
2] Restore.
->> 1 or 2 ?: 1

yourgnome Version 1 , yourgnome - Google Code

this tool used to backup your Gnome in one tar.gz file !
Also, it restores that backup for you when you want !


->> Gnome will be backed up for the user: harry
->> type the path in which you want to save the backup, then press Enter ..
->> e.g. /home/harry/Desktop
->> Path: /home/harry/gbackup

yourgnome Version 1 , yourgnome - Google Code

this tool used to backup your Gnome in one tar.gz file !
Also, it restores that backup for you when you want !


**-->> 0] Creating temporary folder ..
**-->> Done !
**-->> 1] Creating backup of: Gnome Themes ..
**-->> Done !
**-->> 2] Creating backup of: Gnome Background Image ..
**-->> Done !
**-->> 3] Creating backup of: Gnome Configuration Records ..
**-->> Done !
**-->> 4] Creating Info Files ..
**-->> Done !
**-->> 5] Creating Final File ..
Q: What name you want for the final backup file ?
e.g. MyBackUp
filename: mybackup
**-->> Done !
**-->> 6] Removing temporary folder ..
**-->> Done !
____________________________________________________________________________________


If you want to use NON GUI VERSION of YourGnome. It can be downloaded from here

How to use NON GUI Version of Yourgnome . I saved the instructions since they are no longer available at the authors site. I will post them Below::
__________________________________________________________________________________
HowTo
How to use yourgnome.
Introduction

How to use "yourgnome" ?

1- you don't need to install anything !, it's just a bash script.

2- go to your terminal, type sh yourgnome.sh

3- choose:
1 -> Backup your gnome
2 -> Restore a backup


4- follow the on-screen instructions, it's easy !
____________________________________________________________________________________


Ok now for the GUI Link. For Yourgnome 2 It can be found Here
Instructions for Installing and Using and Documentation are on the same page .
Like I said. I've used it. And if you need any more info. You can refer to this Thread . Hope you enjoy using it. It has saved me a lot of hassles.